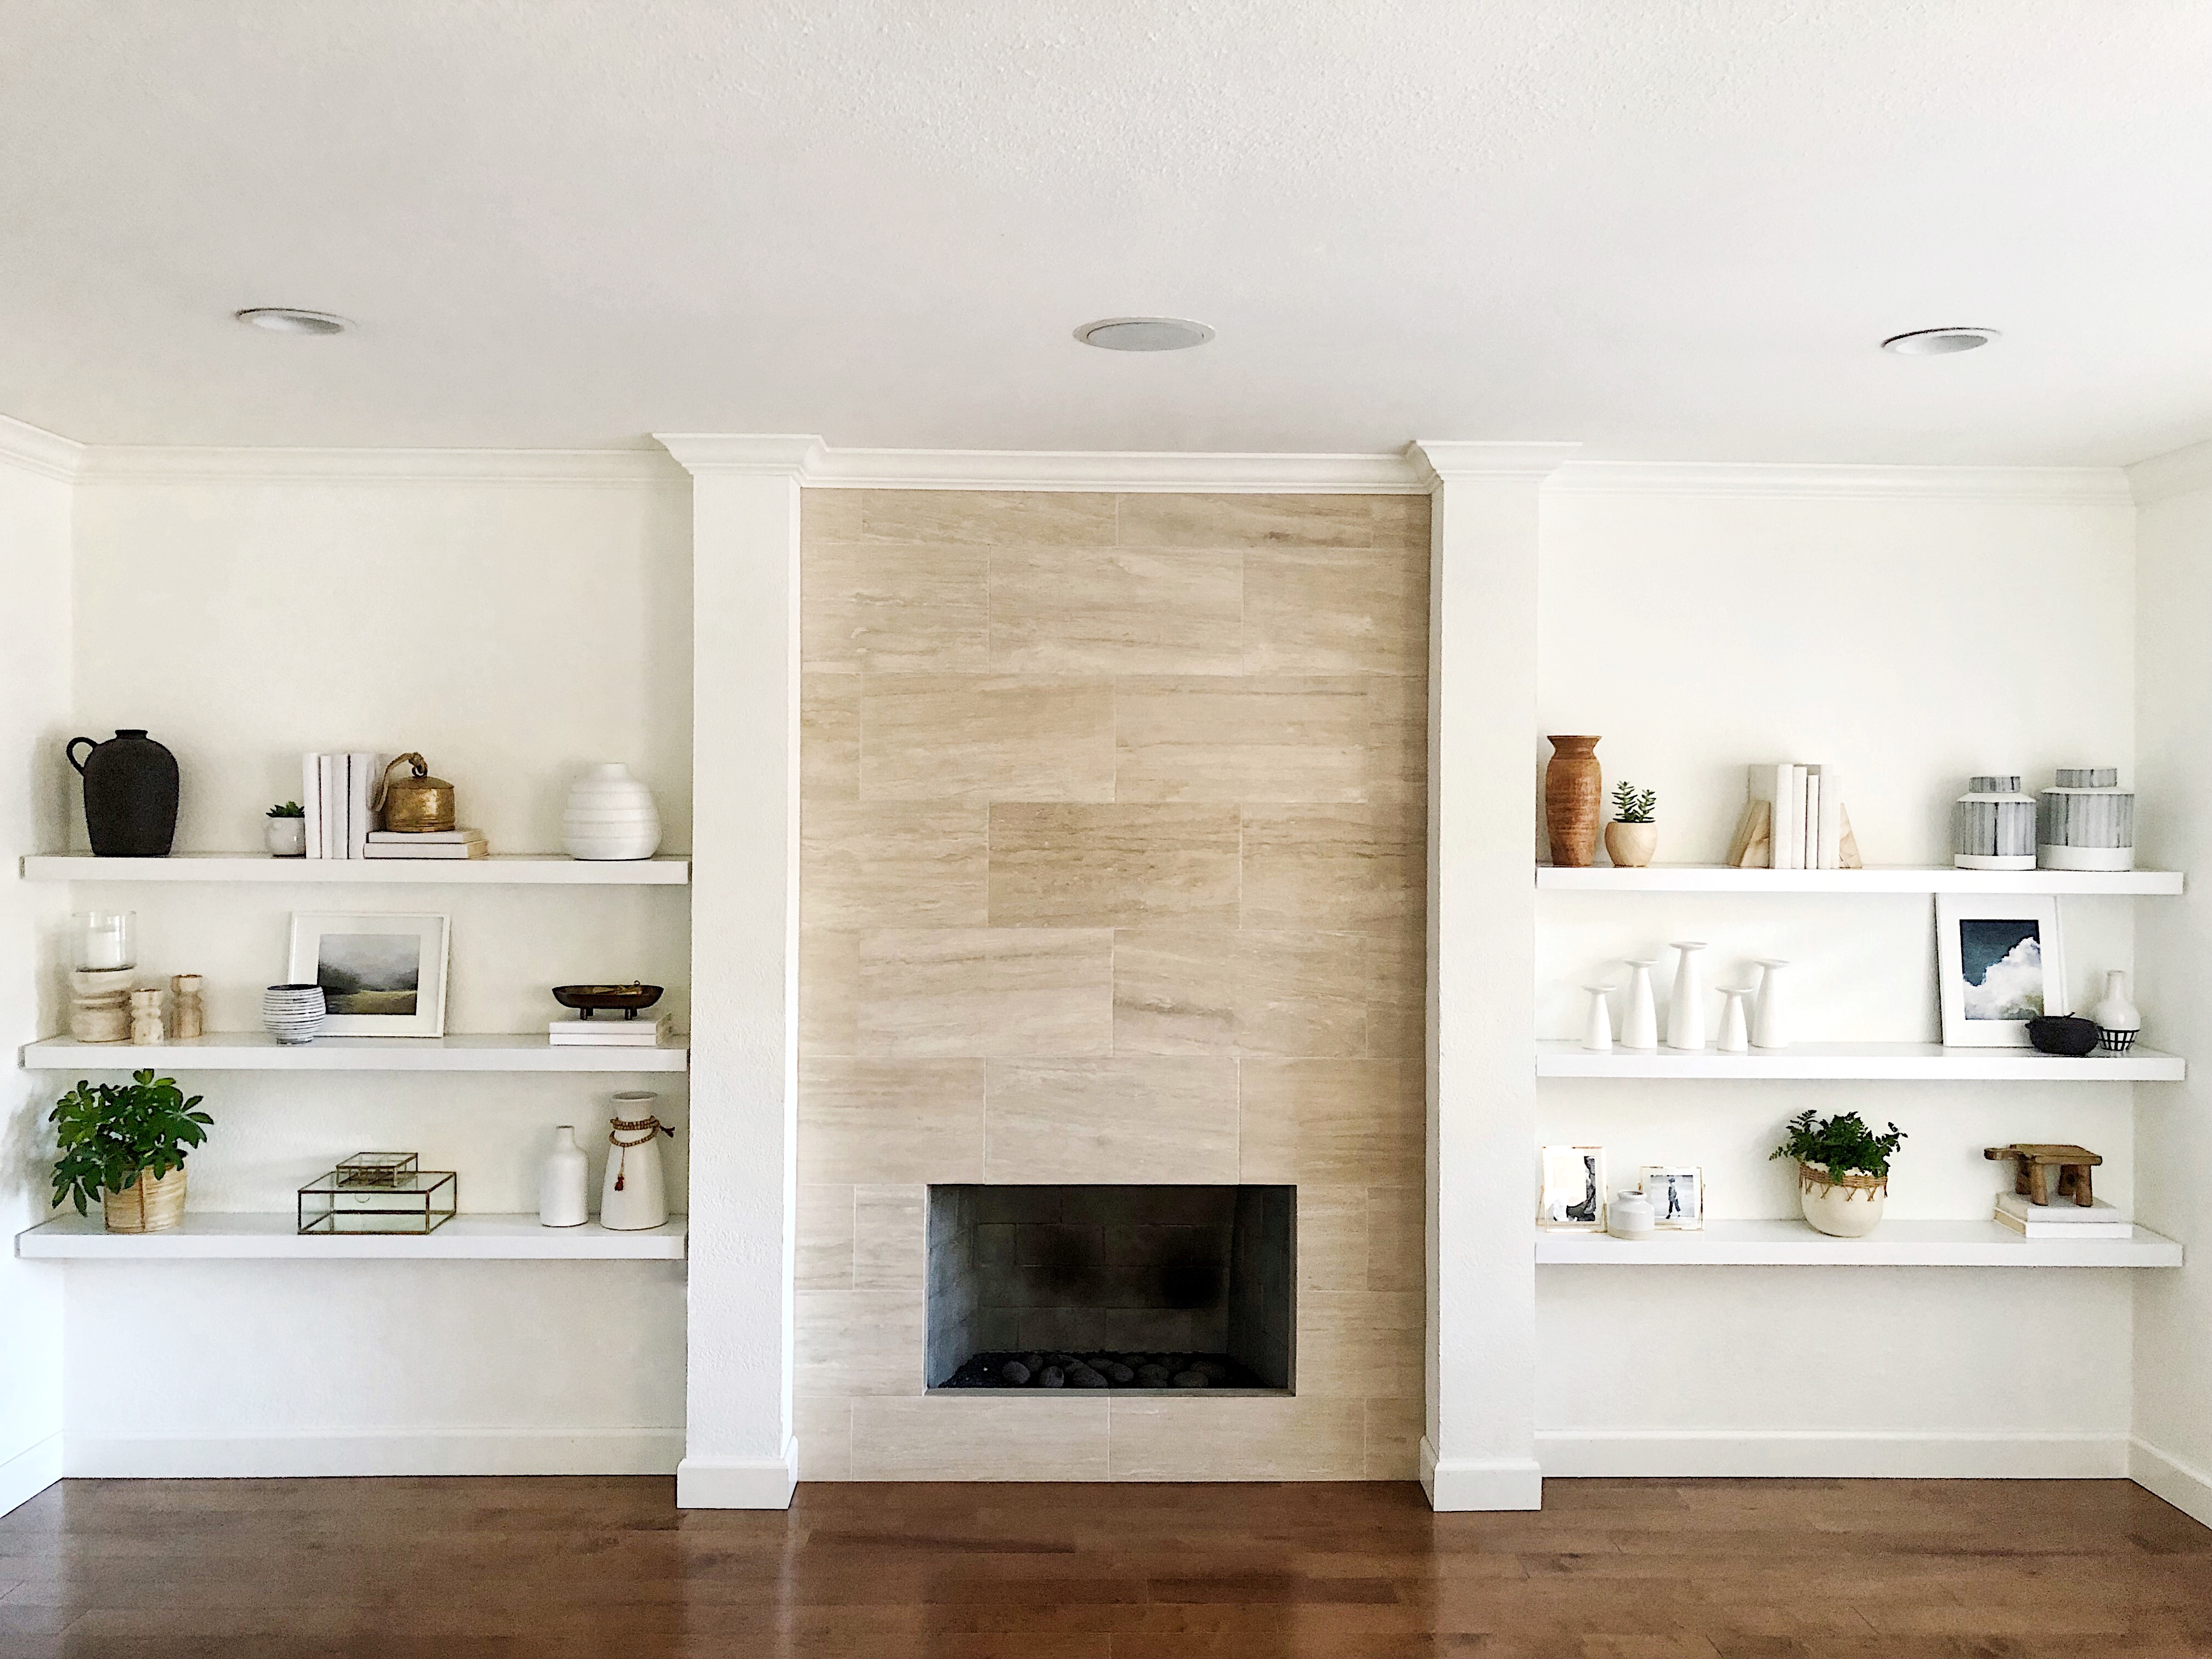
I often get asked, “Where are you putting all those things you buy?”. Enter my friend, Shelfie. Shelves have evolved past holding only the necessities to really becoming a focal point for design. They are a great way to organize and display your collected treasures, while also adding a lot of character to a space.
I am going to show you how I transformed my mom’s living room by adding shelves and then also provide some shelfie styling tips so that your shelves look intentional and cohesive.
Where to Buy Shelves?
The space I had to work with was very long and narrow, so customization was key to achieve that “built-in” look. I teamed up with Shelfology and was able to easily customize the length and depth online, and I can honestly say I am so impressed with the quality. I chose Shelfology’s Aksel Floating Shelf System which comes with the brackets and shelves, and was very easy to install. The shelves are 2 inches thick, giving that substantial impact I was looking for. While I love natural wood color shelves (and they offer a beautiful selection of them), ultimately I chose Shelfology’s painted white shelves for my mom’s space since it fit the color scheme better.
Here’s a look at the brackets that attach to the wall and then how the shelf slides on them.

I liked the balance of three shelves on either side and decided to space them towards the lower half of the wall so that we had room on top to hang artwork or even add lighting. The added shelves instantly made the room feel larger! It’s amazing how adding the right things to a space can visually increase its size.

How Far Apart Should I Hang Them?
I always use painter’s tape as a visual aid before I start the actual calculations to determine spacing. You have to work with the space you have and also the objects you plan to put on the shelves. I have found that 15″ between shelves allows you to fit larger objects on the shelf while still keeping things feeling connected. If you only plan to display books, you will want to keep it closer to 8″-12″. (Also for reference, the shelves I installed were 5 feet long and an 8″ depth. If you have the space, I suggest more than 8″ but this is what we had to work with.)
Tips for Styling Shelves
I am definitely not some evil genius who buys items for shelfies and knows exactly how they are going to be put together before I reach checkout. Styling a cohesive shelfie requires a lot of staring and rearranging and it can get overwhelming. So, here are some things I find helpful when styling shelves:
Start With Books
Starting with books is almost like making your bed before you add the pillows and throws. You create a nice base, so that your other items can shine. So I grouped a few books together and put them on most of the shelves, laying them flat or standing them up for variety. I was so happy when I found fabric covered books from Elements by Amber because it took all the guesswork (and footwork!) out of finding sets that were in the same color family. She also has non-fabric covered books (titles on the spines) grouped beautifully and ready to go.

Pick Your Colors
I suggest picking two or three colors and sticking to that color scheme to help make things feel cohesive.
Mix Textures
Woods, metals, ceramics, glass, clear and opaque! Having a nice mix so that everything doesn’t feel one note can help create interest.

Pick Your Stand-Outs
I use to think the bolder and brighter, the better! But since shelfies have to compliment each other as well as the room they are in, strategically picking what items you want to showcase (whether it be an unusually shaped object or a pop of pattern) helps gel things together.
Group, Group, Group
They say to design in odd numbers and I have found that working with groups of three is a nice start. I like to use items of varying height (propping a book underneath an item to give it some height works nicely too). TIP: Repeating an item helps fill in large spaces and gives the eye a rest.

Set the Tone with Artwork
Artwork is not just for gallery walls. Artwork can be displayed on the shelves or even hung in between the shelves, adding character without overwhelming the space and feeling knick-knacky. For landscape artwork, I am obsessed with Sarah C. Nightingale who offers both originals and prints and whose work has this vintage feel about it. For portrait-like artwork, I recently found Clare Elsaesser who has an amazing collection.
Greenery for the Win
Plants (faux or real) are ALWAYS a good addition.
Shelfie Reveal
I am making over my mom’s whole living room in stages so stayed tuned, but these shelves have already transformed the space!


Shop This Shelfie & Other Great Finds


Love what you did here Erin!! Your Mom must be so happy! <3
Thank you! She loves it so much!
Ah, I love this, it really came together well. Giving me lots of inspiration to style my own build-in’s.
This turned out so incredible, Erin! Your shelfie game is out of this world.
Beautiful! As I’m attempting to update our fireplace, and really like this one, would you share the product on the face. Is it tile perhaps? Many thanks! @stylingirlz
Hi Jennifer! Thank you so much for the compliment. It is a tile from Arizona tile.
Thanks so much for the shoutout and linking it back. That was so sweet of you to say.