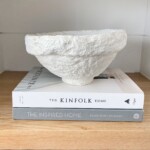
Vintage looking paper mâché bowls have been popping up in the design world for the past year or so, and I am into it! I myself have purchased at least three bowls that I use around my home to style on shelves and coffee tables. So, instead of buying more (because apparently three isn’t enough), I decided that these perfectly imperfect bowls would make a great DIY. Super inexpensive too! I spent less than $5 to make mine.
Supplies:
- Shredded Newspaper (or paper)
- White Elmer’s Glue
- Salt
- Flour
- Cheesecloth Bag
- Paint (optional)
I ended up making about an 8-10″ bowl, so my measurements are based on that. The amount of paper mâché clay you will need depends on the size of your bowl and even your design (you can choose to put a thick rim around it like I did or not, get as creative as you want!).
Directions:
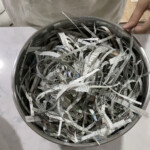
1. Soak the shredded newspaper in hot water.
Put your shredded newspaper in a very large mixing bowl and pour hot water over it, until everything is covered (you’ll want to end up with 6 cups of newspaper pulp, so you will have to repeat this step or use two very large bowls at the same time). You need the paper to become mushy, so the thinner your paper, the faster it will breakdown. You can use regular paper but be prepared for it to take much longer (some recipes I saw said to soak regular paper overnight). Mine took less than 10 minutes to breakdown in the hot water while occasionally stirring. Another option that will break down even faster than newspaper is using toilet paper (although I haven’t tried that yet). FYI: your bowl will get ink on it from the newspaper! But it washes out with some elbow grease.
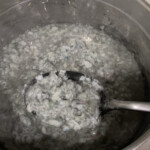
2. Blend the newspaper pulp.
Scoop (preferably with a slotted spoon), the newspaper pulp into a blender and blend away. This helps to break down any clumps and makes the newspaper a lot more smooth.
3. Strain the newspaper pulp with a cheesecloth bag.
I highly recommended buying a reusable cheesecloth bag like this one to strain your blended newspaper pulp. Squeeze until you remove most of the excess water. NOTE: I didn’t want to squeeze it to death so that it was super dry since I did want some moisture to help the flour bind (next step).

4. Add flour and glue.
In a dry bowl, take your 6 cups of newspaper pulp and add 1 cup of flour, about 2 Tbsp of salt (acts as a preservative) and 1/4 cup of white glue. The ratio of paper pulp to flour should be about 3:1. Hand mix it all together like you are kneading dough and feel the consistency, you don’t want it too sticky (more flour needed) or too dry (use a little more glue or even a little water!). Now your paper mâché clay is done! It should resemble a consistency of thick play-doh (smooth and not clumpy). TIP: I found working with a slightly wetter clay was easier to smooth out cracks.
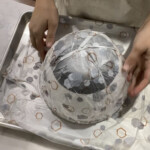
5. Wrap a bowl in plastic wrap and start building!
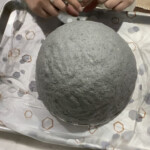
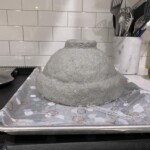
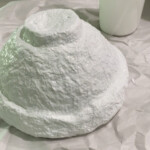
As I said before, I used about a 10″ diameter mixing bowl as the form for the new paper mâché bowl. I wrapped the bowl in plastic wrap (the adhesive press n’ seal wrap worked nicely to stink to the surface of the bowl ) and then I placed the upside down bowl on a baking tray that I had also lined with plastic wrap so that as the bowl dried, it wouldn’t get stuck to the surface. Now build away! I pressed the paper mâché clay around the bowl, laying it on in about a 1/4″ thickness. I then fashioned the base and the thick rim detail separately and smoothed everything together. The clay was very easy to manipulate and I could quickly smooth out any cracks.
Drying Time
I suggest letting it dry for two days before removing from the bowl mold. I removed mine after a day (hello, impatience!) and it immediately collapsed because it was not hard enough to retain its shape (don’t despair if you make the same mistake, just try reworking it a little and smooth out the damage). Blow drying it intermittently over these two days (or if the weather permits, keeping it in a dry/hot place) is also recommended. Once the paper mâché bowl can stand on its own, its ready for the oven!
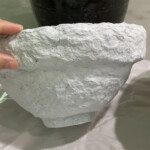
I knew I wanted to paint my paper mâché bowl, so I wanted it to be completely dry before doing so (it does have flour in it, so I didn’t want to take chances with mold either). I would suggest setting your oven to 150 degrees and low baking it for about an hour (turning it right side up half way through). If you used newspaper, you should be noticing your bowl going from a dark gray to a much lighter gray during the drying process.

Painting
Apparently third time is a charm when I went to paint this bowl. I wanted to achieve an off-white color for this vintage vibing bowl, so I spray painted it with Rustoleum Chalked in Linen White (it came out too stark white and showed off every little crack, no bueno). I had some left over Benjamin Moore Chantilly Lace paint on hand, so did one coat of paint (the appearance was so much better! Very creamy in texture now and the cracks disappeared). However, the color was still not right to me (it was still too white!). So I did one last light coat of Rustoleum Universal Matte French Cream Spray and it was perfect!
Do you have to use all three paints? Nope! I would just recommend getting the right color latex paint to cover your bowl. But if you have white paint on hand, use it and just buy the French Cream spray paint because the color was perfectly off-white!
If you need better visuals on this whole paper mâché bowl making process, head to my instagram account and I have a highlight reel saved called Paper Mâché where I saved my stories. Got questions? Leave them in the comments so I see them!
XOXO,
Erin @theheartandhaven


love this idea! looking forward to trying it out 🙂